
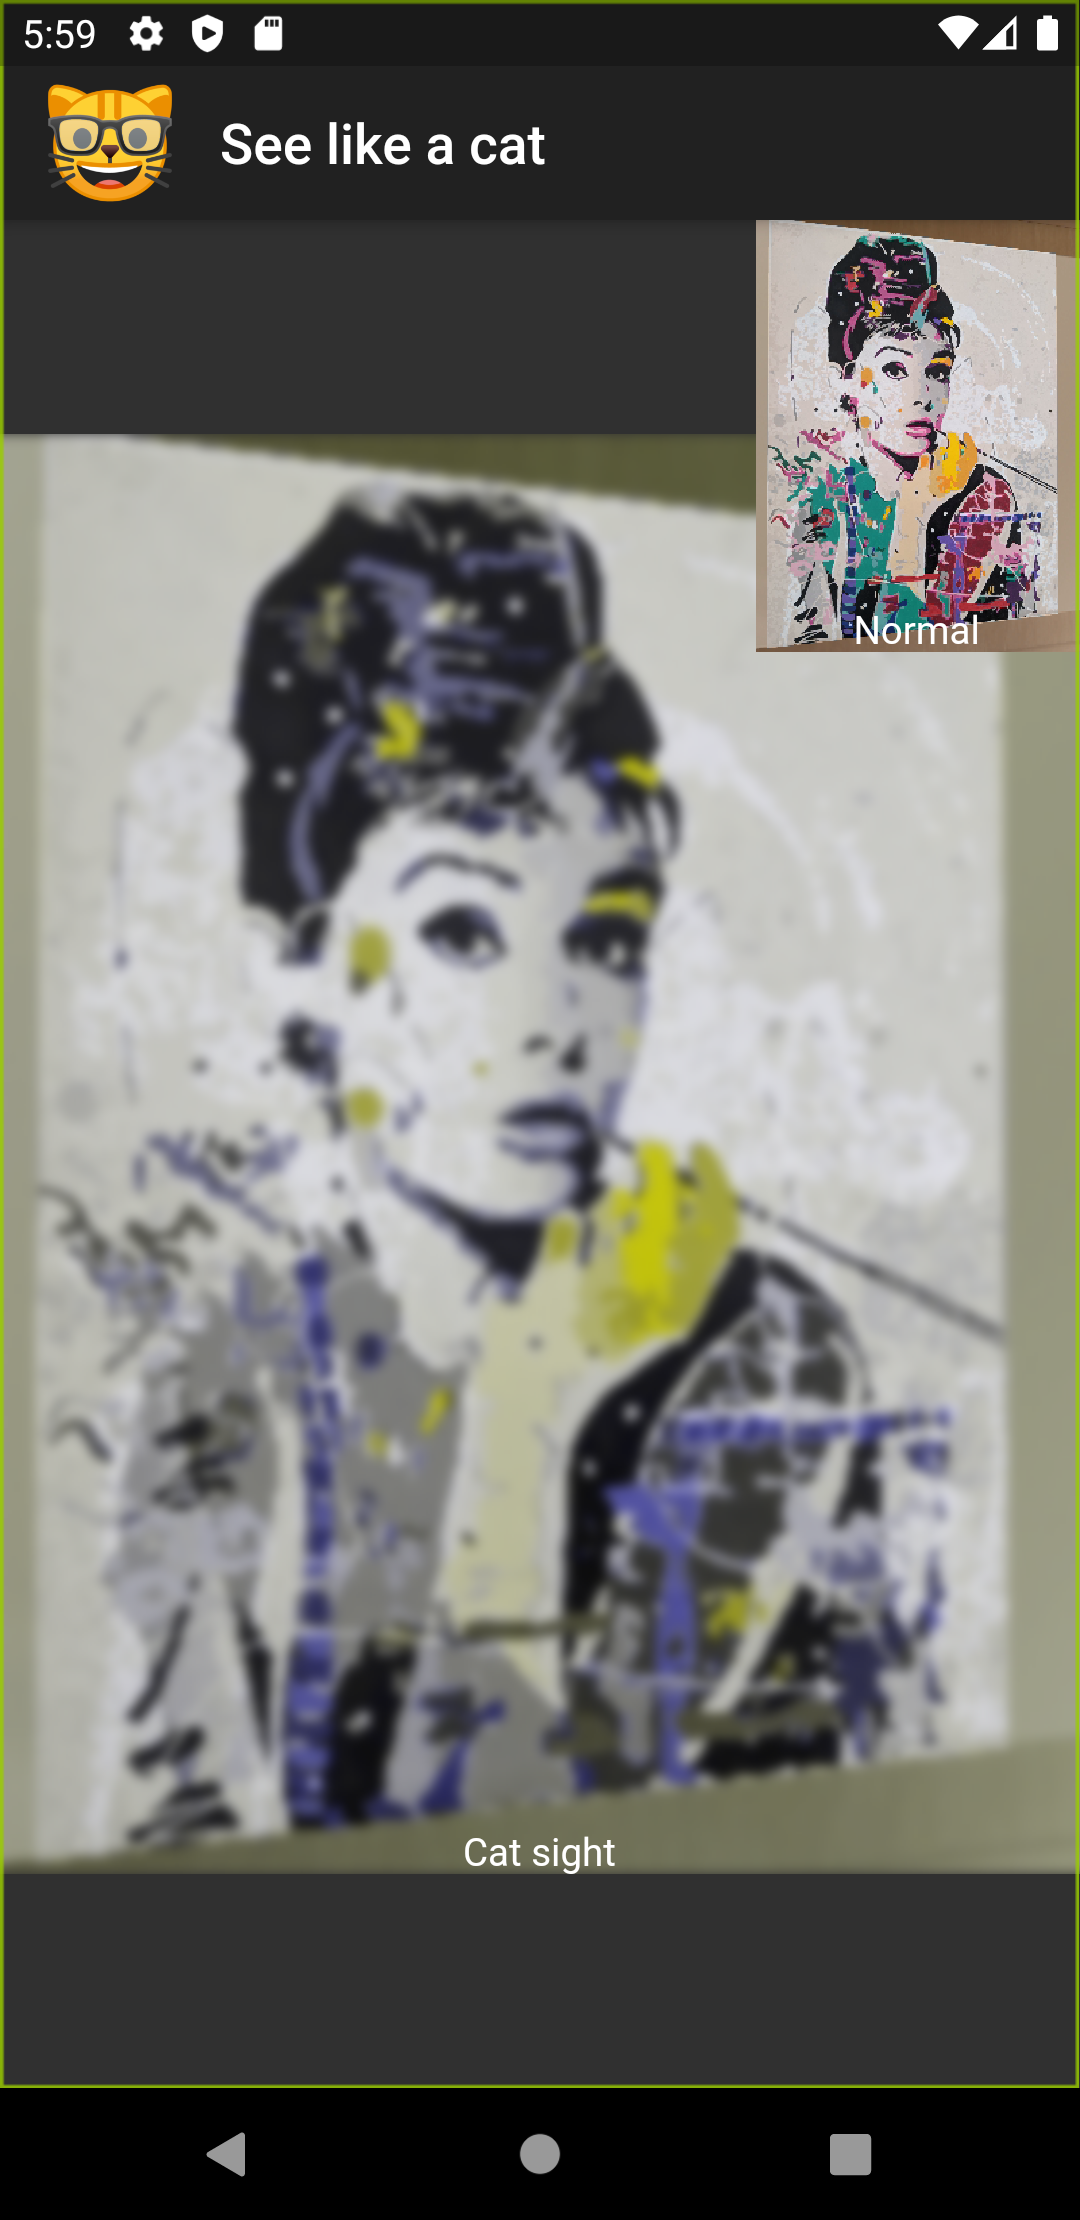
It’s surprisingly easy to create an app that simulates a color deficiency, such as red-green color blindness, by using Flutter’s ColorFiltered widget and applying it to a camera feed. With this insight as main ingredient, I created an app to simulate the vision of cats, who are red-green color blind. Check it out at the Google Play and soon also the Apple app store.
Technology & Motivation
I’ve been meaning to give Flutter, a framework for cross-platform app development, a try. The dream they’re selling almost sounds too good:
Flutter is Google’s UI toolkit for building beautiful, natively compiled applications for mobile, web, and desktop from a single codebase.
The framework isn’t quite there yet. Currently, only Android and iOS are officially supported.
The theory behind simulating color deficiencies
Others have done a very good job at explaining this in detail. Here only the most important bits:
- Humans have three different types of cone cells which roughly correspond to the reception of red, green and blue. Most literature refers to these three types as short, medium and long, or in short S, M and L.
- The cause of red-green color blindness is the lack of L cones.
- Given an RGB input, everything boils down to a bit of linear algebra.
The math
There’s three matrices (in addition with their inverse) involved in the process.
- \(M_{sRGB}\) - converting RGB to XYZ color space, e.g. from this reference.
- \(M_{HPE}\) - converting XYZ to LMS color space using the Hunt-Pointer-Estevez transformation matrix.
- \(S\) - Applying a color deficiency.
\(S\) can be chosen depending on the kind of deficiency you want to simulate. A good starting poing is this research paper which discusses simulating mixes of deficencies at various strengths. For a given \(S\), the expression can be simplified since all matrices involved are constant
\[\begin{bmatrix} r' \\ g' \\ b' \end{bmatrix} = T_{S} \cdot \begin{bmatrix} r \\ g \\ b \end{bmatrix}\]which gives us the matrix \(T_{S}\) for plugging into the app.
Implementation
There’s two main components here: Getting a camera feed and then applying the color transformation.
Camera feed
Flutter has thriving plugin environment, many of them provided by the flutter team. The camera plugin is one of them.
Initialization is somewhat cumbersome, but the documentation does a good job explaining all the steps. I had some trouble figuring out all steps necessary to make it look right on all devices, but in the end succeeded by making use of AspectRatio and RotatedBox.
The rotation was exceptionally hard to get right. Once I realized that there’s likely no easy solution, I started noting down measurements of the reported device and camera orientation for all devices I had laying around. At first I attempted to also support landscape mode, but then decided to simplify to portrait only. Here’s the measurements.
| Model | Lens direction | Orientation | Reported camera orientation | Reported device orientation | Required rotation |
|---|---|---|---|---|---|
| Nexus 6P | front | Portrait | 1 | 1 | 0 |
| Nexus 6P | back | Portrait | 1 | 1 | 0 |
| Pixel 3a | front | Portrait | 3 | 1 | 0 |
| Pixel 3a | back | Portrait | 1 | 1 | 0 |
| Pixel C | front | Portrait | 0 | 1 | 3 |
| Pixel C | back | Portrait | 0 | 1 | 1 |
| Galaxy A5 | front | Portrait | 3 | 1 | 0 |
| Galaxy A5 | back | Portrait | 1 | 1 | 0 |
In portrait mode, only the Pixel C, the only tablet, was acting out of line. So I added special handling for the camera orientation 0, which is only reported on the Pixel C. This lead to the following implementation.
class CameraPreviewWidget extends StatefulWidget {
  CameraDescription camera;

  @override
  CameraPreviewState createState() => CameraPreviewState();
}

class CameraPreviewState extends State<CameraPreviewWidget> {
  CameraController _controller;

  @override
  void initState() {
    super.initState();
    // Initialize _controller.
  }

  @override
  void dispose() {
    // Dispose _controller.
     super.dispose();
 }

  @override
  Widget build(BuildContext context) {
    int quarterTurns = 0
    int quarterTurnsCamera =
              _controller.description.sensorOrientation ~/ 90;
    if (quarterTurnsCamera == 0) {
      // Pixel C is the only device that returns sensor orientation 0 and needs some fixes.
      switch (widget.camera.lensDirection) {
        case CameraLensDirection.front:
          quarterTurns = 3;
          break;
        case CameraLensDirection.back:
          quarterTurns = 1;
          break;
        default:
          // Nothing.
          break;
      }
    }

    // Wrapping the CameraPreview in a AspectRatio makes sure the
    // image doesn't distort depending on the screen space available.
    return AspectRatio(
      aspectRatio: _controller.value.aspectRatio,
      // Some sensors are not oriented the same way as the display, thus
      // the camera preview needs to be wrapped in a RotatedBox.
      child: RotatedBox(
        quarterTurns: quarterTurns,
        // Camera preview from controller.
        child: CameraPreview(_controller),
      ),
    )
  }
}
Color transformation
So how does the matrix \(T_S\) from above make it’s way to the camera feed? Enter Flutter’s ColorFiltered class.
The introduction video suggests applying it to an image asset in conjunction with blend modes.

But when reading through the docs, I found out that you can also set an arbitrary matrix. Here’s a simple example wrapping the widget from above in a ColorFiltered.
Widget build() {
    /*
    From the flutter docs:
    Construct a color filter that transforms a color by a 5x5 matrix, where the fifth row is implicitly added in an identity configuration.

    | R' |   | a00 a01 a02 a03 a04 |   | R |
    | G' |   | a10 a11 a22 a33 a44 |   | G |
    | B' | = | a20 a21 a22 a33 a44 | * | B |
    | A' |   | a30 a31 a22 a33 a44 |   | A |
    | 1  |   |  0   0   0   0   1  |   | 1 |

    */
    // This example switches the red and green color channel.
    const ColorFilter switchRedAndGreen = ColorFilter.matrix([
    0, 1, 0, 0, 0,
    1, 0, 0, 0, 0,
    0, 0, 1, 0, 0,
    0, 0, 0, 0, 0
    ]);
    return ColorFiltered(child: CameraPreviewWidget(), colorFilter: switchRedAndGreen)
}
Thanks to Flutter’s modular approach, any Widget can go there as a child, also the camera preview described above. A few things to note here:
- Be careful with notation:
ColorFilteris row-major while Dart’sMatrix4class is column-major. ColorFilteris a const and thus needs to be known at compile time. Precompute your matrix!
Conclusion
Plugging these two things together lead to a quick prototype. Once I was this far, I was already hooked on Flutter. Here’s a few things I liked especially:
- Dart is big leap forward from Java, with which I had my last app-writing experience.
- One codebase for all platforms is great!
- The community is fun! For example there’s short, easy-to-digest videos that give you an intro to essential components.
- The developer experience is very smooth with nice utilities like the hot reloading, the web debugger and more.
But of course things are not perfect. When polishing the app for release, I also encountered a few bumps:
- Some (official!) plugins don’t meet the high quality bar of the main components. I ran into several issues when using them.
- At the bottom of all the shiny widgets, there’s still bindings to native java/swift/objective-c code. Dealing with issues at this layer is not pretty.